 by
by What is Centos Web Panel (CWP)?
CWP stands for CentOS Web Panel. Centos is a respected, community driven, and CPANEL/WHM direct competitor. It was created for use in quick and easy management of Dedicated Servers and VPS Servers without the need to use an SSH console for every task. You can host multiple domains for free using this web panel. It is very easy to setup and manage.
It is free to install and incredibly versatile in addition to being open source and community supported. CWP offers several dedicated support channels and has several additional benefits such as:
- Restore your CPanel Backup Server
- Automatic generation of DNS records (DKIM, DMARC, SPF, Zone files)
- There is no limit on the number of domains a server can host (in addition to VPS resources)
- Allowing the addition and configuration of dedicated IPs
- There is no limit on the number of user panels you can create.
- Centos provides both free and released tiers.
- You can enable quotas for users.
- Server backups and optional remote server backup configurations are built into the platform.
- It allows the possibility of API calls for automation if needed.
- Centos supports Softaculous and WHMCS for ease of use.
- It comes standard with built-in scripts for WordPress, Drupal, PrestaShop, Joomla.
- Provides an automated WHMCS installer in the admin console
What should CWP be used for?
CWP is a fully functional web hosting management platform that only requires a VPS or dedicated server to install. Below are categorized steps to help you begin a complete manual installation of CWP. Note that CWP only supports a static IP address.
Note: Server preparation required
Before installing CWP itself, you need to make sure your server is running a fresh install of CentOS 8 from our Cloud OS images. Note that this is a minimal server install.
Although this installation is a fairly simple process, it takes a long time to complete and sometimes it can take up to 25 minutes. Once the installer script is running, feel free to go away and check back periodically. The reason for this is that the script you are downloading installs a lot of dependencies.
Prerequisites
Make sure that each of these requirements described below are available before beginning the installation process.
- A fully updated Centos server
- Lamp stack installed
- 32-bit server – 512 MB of RAM
- 64-bit server – 1024 MB RAM
- Driving space – 10 GB
Make sure system repositories are enabled
Step 1: Before starting any further installation, make sure your operating system has the correct repository loaded.
yum install https://dl.fedoraproject.org/pub/epel/epel-release-latest-8.noarch.rpmStep 2: Install wget
dnf install wget -yStep 3: Update the server.
yum -y updateStep 4: Restart
reboot Step 5:
cd /usr/local/srcStep 6:
wget http://centos-webpanel.com/cwp-el8-latestStep 7:
sh cwp-el8-latestStep 8: Note down the login details printed after installing the setup.
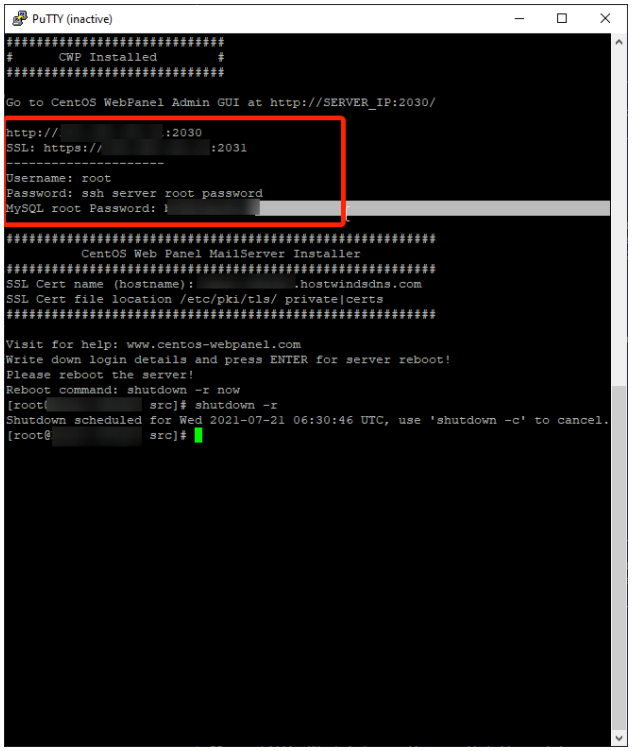
Step 9:
rebootCWP Configuration for First Domain and User
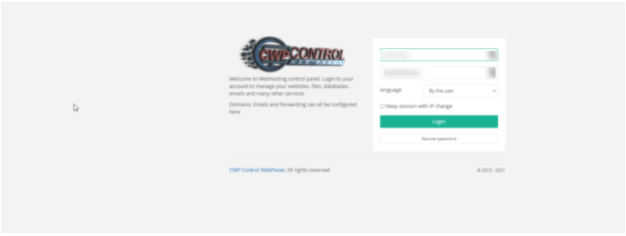
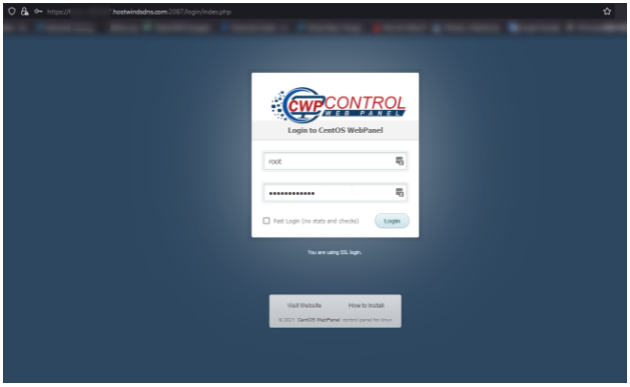
Step 1: Login to the server admin URL with your browser using the link below.
[https://ServerIP:2031](https://ServerIP:2031)Step 2: Enter your root user login credentials for the server. This is the one and only administrative user that is logged into the CWP Control Web Panel entrance.
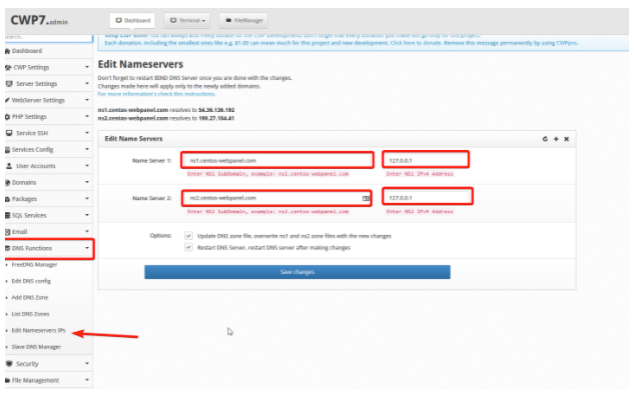
Step 3: You need to update the nameservers for the installation. Note that you usually want the cloud DNS servers or the private nameservers of your domain and IPS. Navigate to the DNS features drop-down on the dashboard and enter your nameservers. You are given the choice to update and restart your DNS server using the checkboxes under the nameservers entry. Make sure these are checked to continue.
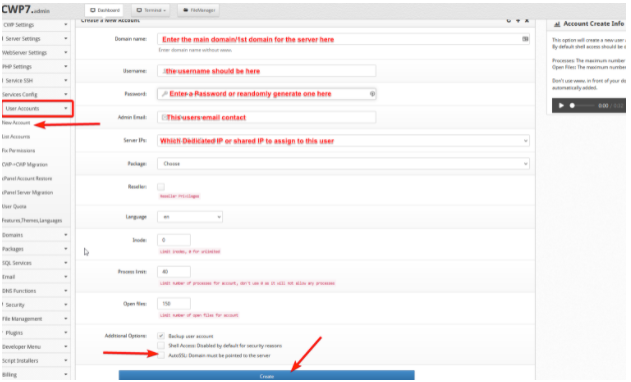
Step 4: Create a user and enter your first domain. Go to the user account drop-down list on the dashboard and enter the information described below:
- Domain Name: The primary domain or first domain of the server
- Username: The username of the server administrator
- Password: The password you will use for this server. You can also enter one of your choice or generate a random one.
- Admin Email: This is the email contact you should use as an administrator
- Server IP: This is the dedicated or shared IP that you will be using
Step 5: Enter the Customer Panel URL
[https://ServerIP:2083](https://ServerIP:2083)Step 6: Enter the client username and password you just created to enter your new dashboard and don’t forget to save it for future use.